
***click on any photo to see them enlarged***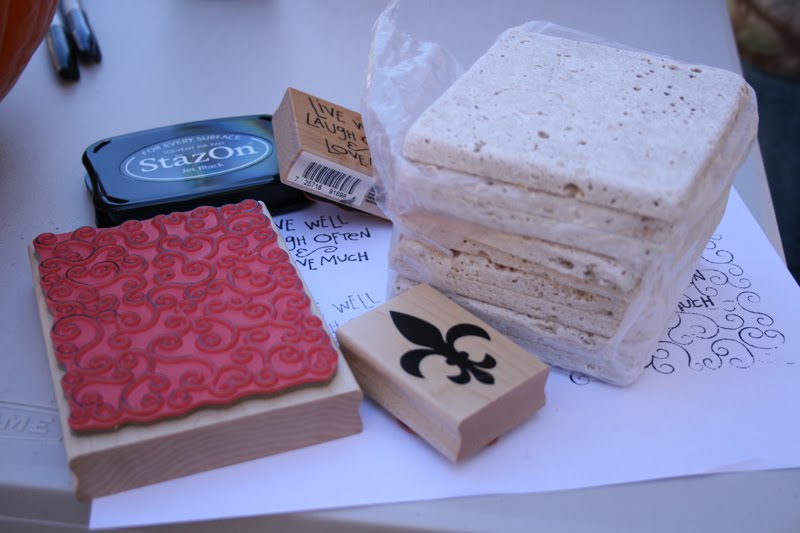
Here's what you'll need
* a set of 4" tiles - I grabbed a pack of the tumbled tiles from Home Depot - I prefer the look of the tumbled ones
* Staz on Ink Pad - whatever colors you like
* Rubber Stamps
* Clear Satin enamel spray to seal (not shown in this pic, you'll see what can I used later in this tutorial)
* Felt or cork stick on surface guards (i used 3/8") (photo'd and shown later in this tutorial)

First start by just wiping the tiles clean with a damp cloth so they are ready for you to put your design on. I experimented with what I wanted to put on my tiles on a piece of paper. For this particular set, I have a friend who is a HUGE New Orleans Saints fan, hmmm, these might be perfect in her house! There are so many fun rubber stamps out there for you to be creative with. For my set I chose a swirly pattern for a background and then overlayed it with my fleur de lis stamp. You could choose a smaller print and just do a repeated stamp across the tile. Place the stamp randomly where sometimes only half of it is seen along the sides or corners, it looks pretty! Another idea might be to put some words or an initial in the center and then stamp the 4 corners with something giving it a border. Just use your imagination and experiment on a piece of paper before the tile so you can see what direction you want to go. If you were more ambitious, you could also get stencils for a pretty pattern and just use a block rubber stamp to fill in the design with the ink.
My son is 5 (there he is pictured above in action) and he helped me with these so even the young ones can get in on the fun of being creative!
Using the Staz On Ink, apply whatever design you like to your tile. Be sure to press firmly with your stamp and then let dry.
Once your design is dry we need to spray a sealant on the tile. We don't want your ink to bleed so it needs a sealant. Use what brand you like, I've used a can of the Valspar clear satin spray that you can pick up at Home Depot or Walmart. Find a piece of cardboard or better yet a box and spray a coat onto the tile. Do this outside in a ventilated area. A box is best if your day is a little breezy. Now let this coat dry.
Now that they are dry, stick on your cork or felt guards to the bottom so they won't scratch the surface that they sit on.

That's it, you are done! Put them out on your side tables to use or stack them and tie up with a pretty piece of ribbon for a gift. Hope you had fun flexing those creative muscles!
Monday, November 1, 2010
Handmade Coaster Tutorial - Fun one with the kids!!
I'm getting a headstart this year on doing some gifts! I shouldn't post to the blog, going to be a bit of a spoiler for some of you in my life, but oh well, here goes! We did these yesterday and I really loved how they turned out so wanted to share how to create these coasters. If you are on a budget this year this is a great thing to try! Better yet, if you like making something where your kids can lend a hand as well, this is the perfect project.
Subscribe to:
Post Comments (Atom)


1 comment:
ohh, those look nice, I painted on a couple and sold them as sets but I honestly don't think they were as nice as yours. Beautiful!
Post a Comment